In this post I want to show you how you can you can use tasks within your SharePoint 2013 workflows developed with Visual Studio 2012. Frankly that’s pretty simple, and demonstrated well in this blog post on the Office Apps Team blog, so I’m going to focus on custom tasks. In the next post I’ll show you how you can take it to the next level and add your own custom outcome fields for a more personalized experience for your users.
WorkflowCustomTask01
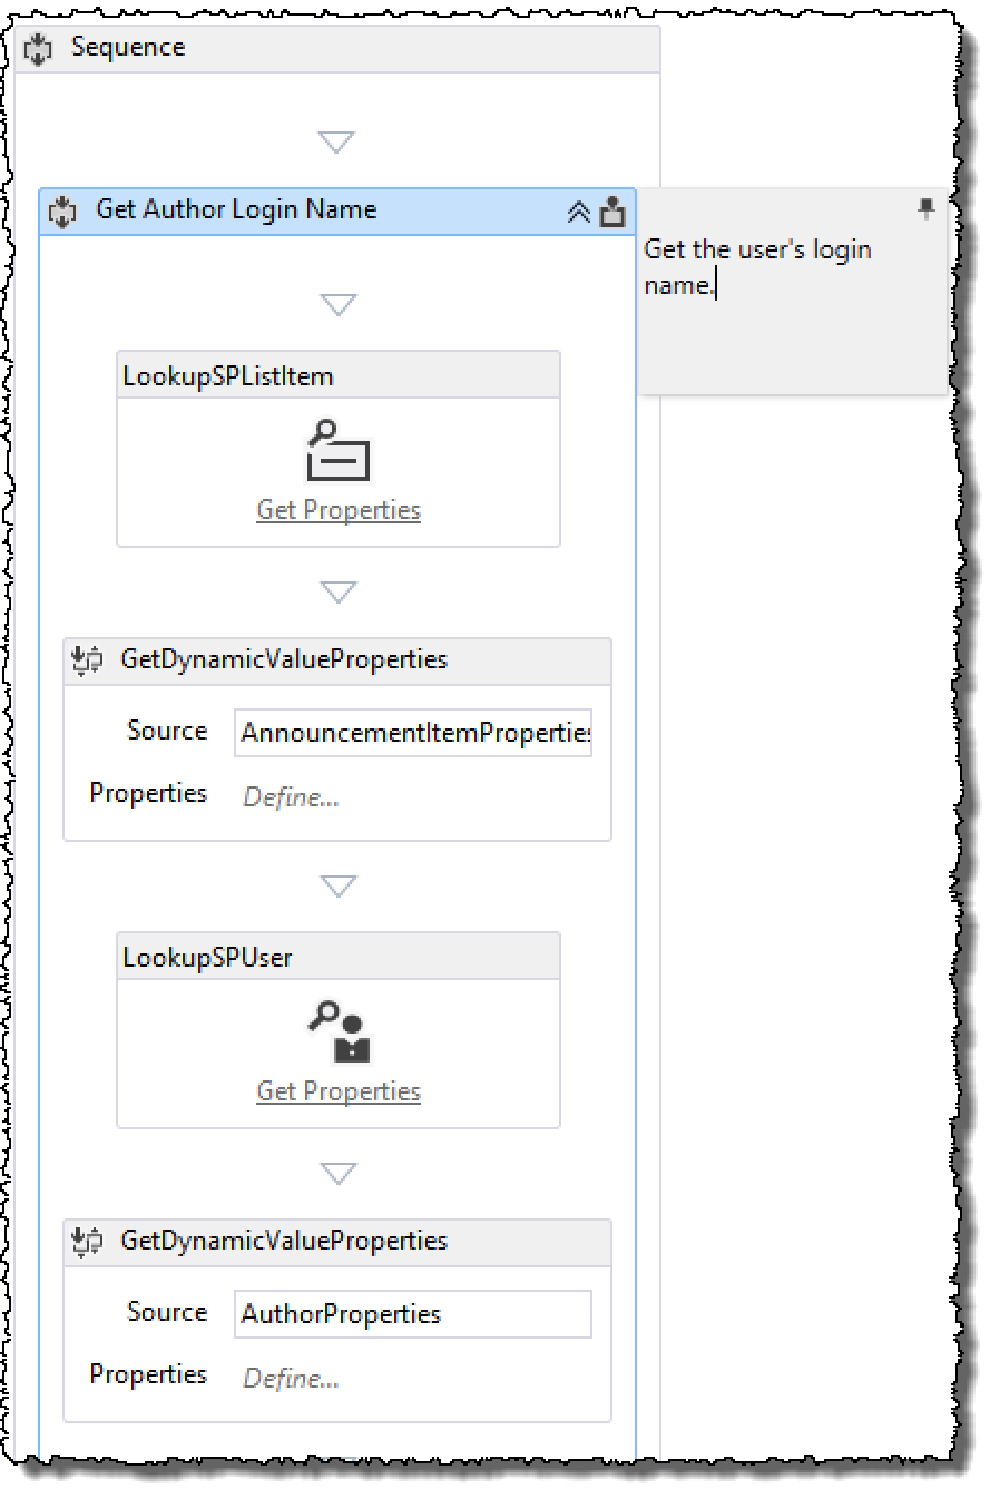
I’ll first start out by creating a workflow in a new SharePoint Hosted App and attach it to an announcements list, configured to start automatically when items are added to the list. With that done you will then need to get a sign in name in the form of a claim ID to assign the user a task. For that I’ll use the following activities and configure them store the sign in name of the user who kicked off the workflow in a local variable:
- LookupSPListItem: Used to get all the properties of the item that started the workflow.
- GetDynamicValueProperties: Used to parse out the
AuthorIdfrom the previous activity’s results. - LookupSPUser: Used to get the properties of the user that corresponds to the
AuthorId. - GetDynamicValueProperties: Used to parse out the author’s
LoginNameproperty from the previous activity’s results.
So far we’re in good shape and simple stuff.
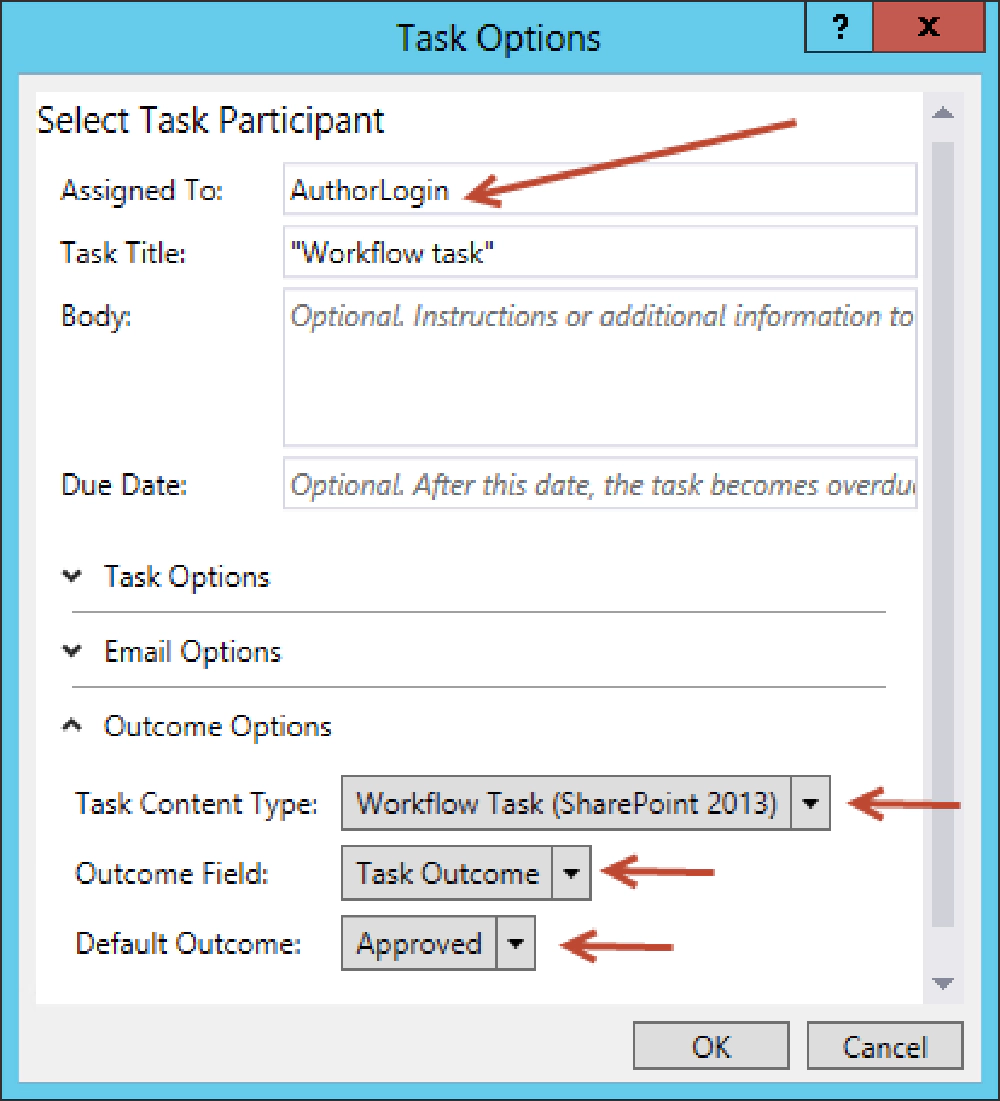
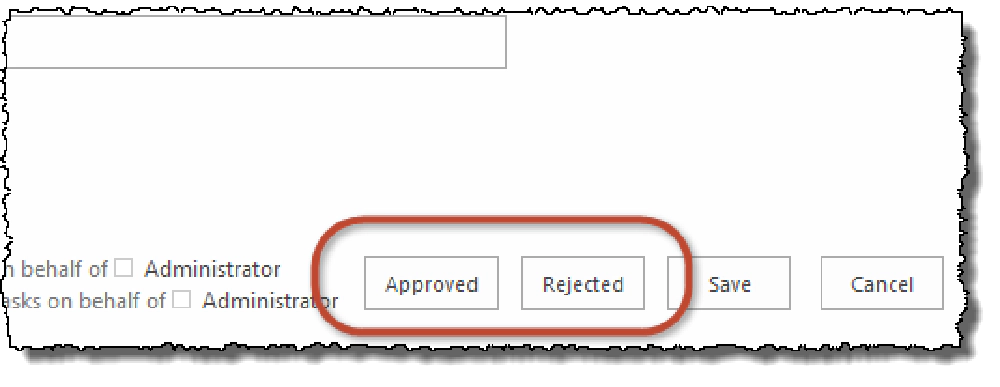
Next, add a SingleTask activity to the workflow. Open its properties and make the following selections shown in the designer below to assign the task to the person who kicked off the workflow and to use the out of the box Workflow Task (SharePoint 2013) content type as the task type. When you run the workflow and view the task created in edit mode, notice the buttons you have at the bottom aside from the standard Save & Cancel: you have Approve and Reject. Those came from the default outcome field on the Workflow Task (SharePoint 2013) content type.
WorkflowCustomTask02
WorkflowCustomTask03
Create a Custom Task Content Type for a Workflow
Now let’s see how we can put additional fields in the task form. This is done by creating a new content type and adding additional columns to it. Create a choice column using the Site Column project item template:
<?xml version="1.0" encoding="utf-8"?>
<Elements xmlns="http://schemas.microsoft.com/sharepoint/">
  <Field ID="{baeea9f4-3589-420c-80ee-27e58c4286c2}"
         Name="MonthsColumn"
         DisplayName="Months"
         Type="Choice"
         Group="AC">
    <CHOICES>
      <CHOICE>January</CHOICE>
      <CHOICE>February</CHOICE>
      <CHOICE>March</CHOICE>
      <CHOICE>April</CHOICE>
      <CHOICE>May</CHOICE>
      <CHOICE>June</CHOICE>
      <CHOICE>July</CHOICE>
      <CHOICE>August</CHOICE>
      <CHOICE>September</CHOICE>
      <CHOICE>October</CHOICE>
      <CHOICE>November</CHOICE>
      <CHOICE>December</CHOICE>
    </CHOICES>
    <Default>February</Default>
  </Field>
</Elements>
Next create the content type. When presented with the option of which content type to inherit from, select Workflow Task (SharePoint 2013) and add the column to the content type along with the:

WorkflowCustomTask04
There’s one more important step you need to do before you use this task content type you’ve created. All workflow tasks are going to be created within a specific task list within the app. If that list doesn’t allow for your new content type to be used, you’ll get a runtime issue that throws an ArgumentException on your content type ID. I like to address this by adding an Empty Element to my project and use the ContentTypeBinding option within the element manifest to bind our custom content type ID to our workflow task like so:
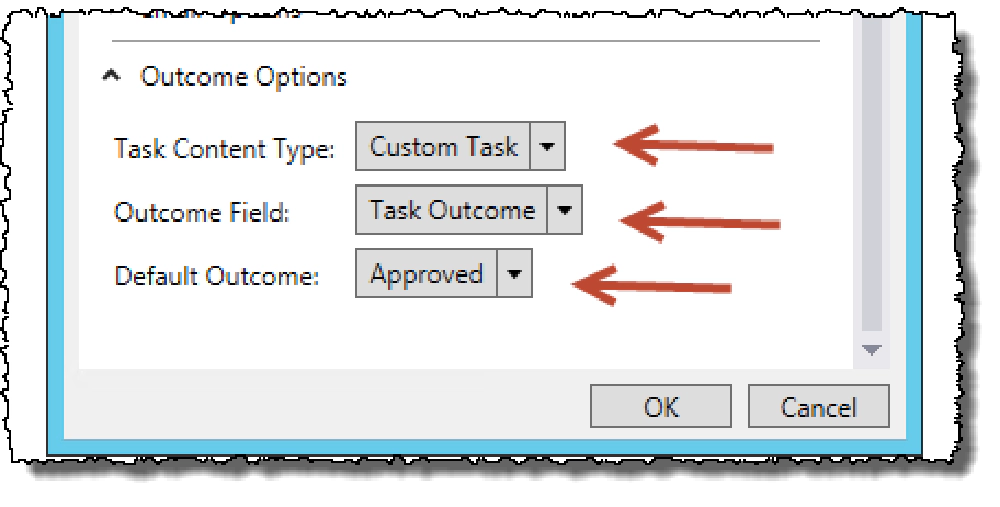
Update the SimpleTask activity so that it uses the new content type you just created. Notice that there are only two options in this dialog. Only tasks of type Workflow Task (SharePoint 2013) are available. When you run the workflow and look at the task created in edit mode, you’ll see your new column!
WorkflowCustomTask05
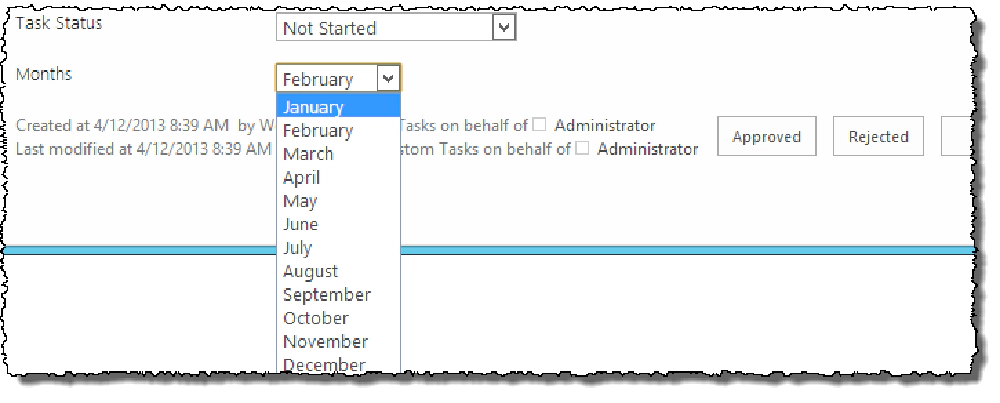
WorkflowCustomTask06
This was simple enough. In my next post I’ll build off this and I’ll show you a little bug in the workflow engine and how to work around it.